The standard of simple, easy to use phones just keeps getting better. The new Breeze IV™ is the perfect cell phone for the entire family, including seniors, simplicity seekers and first time mobile users with its intuitive user experience. The slender clamshell design slips easily into a purse or pocket and its external display alerts you to battery status, new messages and missed calls. Now in its 4th generation of Breeze, the Breeze IV™ is designed for easier accessibility and convenience, making it a great cell phone for moms, kids and senior citizens.

Trouble with squinting? Is your phone hard to read? Grab the Breeze IV™ and get access to a crystal clear 3-inch display – one of the largest of its kind for basic phones. Now icons, text and images are even easier to see.

Capture quality images and video of your kids and grandkids on the go. Breeze IV™ has an improved 3MP Camera with 4x digital zoom, Auto-Focus and LED flash so your pictures and videos will come out looking great!

The Pantech Breeze IV™ has new useful tools like Magnifier, which lets you enlarge small print on menus, medicine and more for easier reading. Turn on the flash for even better visibility, plus save the image to your phone for future reference. Slow Speech allows you to slow down live calls or voicemail recordings to listen to conversations and messages more clearly. These features make the Pantech Breeze IV™ the perfect cell phone for seniors.
Click here for a demo of the Slow Speech function

Pantech Breeze IV™ has two easy to use modes. Set it to Breeze Mode to see intuitive, streamlined menus with easy to read oversized text on a large 3-in display. In Advanced Mode you’ll have an icon-based menu to tap into mobile email, web browsing, music and more. Both pair well with this large button cell phone.

The Pantech Breeze IV™ can operate by voice recognition. Simply say a command and the phone will find a contact, place a call or write a text message. Just one more reason this is an ideal senior cell phone. Plus, for teens, the Breeze IV™ is compatible with Bluetooth® and Micro USB, so they can pair it with their favorite headset.
Use Readout Mode, a text to speech function, for when you can't or don't have the ability to read the phone screen. When activated, the phone will verbally announce missed calls, low battery, key entry, navigation, content information, web browsing, music and more.


| Height | 4.19" |
|---|---|
| Width | 2.09" |
| Depth | .69" |
| Weight | 3.88 oz. (with standard battery) |

| Display Size | 3.0" |
|---|---|
| Resolution | 240 x 400 |
| OS | Pantech Proprietary (J2ME) |
|---|
| Cellular Technology | GSM/GPRS/EDGE |
|---|---|
| Bluetooth |
|
| Text Messaging |
|
|---|---|
| Instant Messaging (IM) |
|
| Mobile Email |
|
| Web Browser |
|
|---|---|
| Preloaded Apps |
|
| Camera Resolution | Up to 2048 x 1536 resolution |
|---|---|
| Zoom | 3MP camera with 4x digital zoom |
| Video Capture |
|
| Video Player |
|
|---|---|
| Music Player |
|
| Battery Type | Li-Ion 1030mAh |
|---|---|
| User Talk Time | Minimum of 3 Hours |
| Standby Time | Minimum of 10 Days |
| Format | 66MB - 32GB (microSD) |
|---|
| Predictive Text |
|
|---|

"providing simplicity seekers and senior consumers an intuitive and easy-to-use mobile experience"

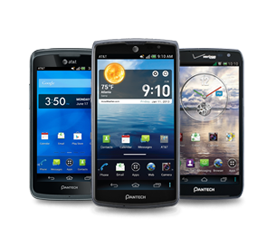
"The Breeze IV is a simple device, but offers a large 3-inch main screen with 400 x 240 pixels, and a 1.44-inch external screen with 128 x 128 pixels."

"Continuing the Breeze line that started in March of 2009, the Pantech Breeze IV arrived at AT&T Thursday November 14, 2013."

"The fourth generation in its celebrated line of easy-to-use phones for AT&T"

"For seniors and simplicity seekers seeking a more streamlined, simplified way to stay in touch and help manage their lives"

Pantech's Lithium Ion battery is designed to give you the best performance possible. This Litium Ion battery is specifically engineered for your Pantech mobile phone to deliver the most reliable and long lasting power. (1030mAh)

The Pantech Breeze IV Battery Cover is engineered to offer protection for your 1030 mAh Lithium Ion battery.

Don't risk a dead battery at the moment when you need your cell phone the most. By keeping the Pantech Wall Charger handy while at home or at the office, you can be sure that your Pantech device's battery life is topped off and you're ready to go at a moment's notice.

The micro-USB to USB Charging Date Cable connects your Pantech device to your Pantech wall charger for the best possible charging experience. The USB Charging Date Cable also allows you to transfer data files such as music, video, image, etc...between your Pantech device and a compatible PC via USB.
To order accessories for your Pantech Mobile device email or call 9:00 AM – 6:00 PM CST Mon through Fri
Your Pantech P2050 Breeze IV has two customized modes, Breeze and Advanced. The default setting is Breeze mode, which provides you with quick access to functions that are used most frequently. The Advanced mode allows access to all menu items.
To change the phone mode:
1. Select Menu > Settings > Phone Mode.
2. Select Breeze Mode or Advanced Mode.
*Must have external memory card in handset in order for this option to work.
1. Select a file > Options > Move > Choose folder in Memory > Here.
2. To move the file back to the phone, select Options > Move to Phone.
1. Connect the Pantech USB cable with phone and the computer.
2. Select Menu > Settings > ConnectIVity.
3. Select USB Mode.
4. Select Music Player, Mass Storage, Modem, or Ask on Connection.
5. Follow the instructions on your computer screen.
1. Connect your phone to a PC with the data cable.
2. Select USB Mass Storage button.
3. On your PC, go to My Computer and open the removable disk drive, where you will see a list of files same as on your microSD card. Open the folders and make desired changes.
You can automatically receive the network date and time to your phone.
1. Press the Menu key from the Home screen.
2. Tap Settings > Phone > Time & Date.
3. Tap Auto Update to turn it on.
You can also manually select your date and time:
1. Press the Menu key from the Home screen.
2. Tap Settings > Phone > Time & Date.
3. Tap Auto Update to turn it off.
4. Tap Time and modify the time.
5. Tap Date and modify the date.
PC Suite is a Windows based PC program that allows you to easily manage address book, contacts, messages and multimedia files by connecting your phone to a PC.
System Requirements:
(1)Microsoft Windows 2000, XP family, Vista 32 bit, Windows 7, or Windows 8
(2) At least 300 MB of free disk space
(3) Interface devices such as USB or Bluetooth for connection with the phone
Features: Contact Manager, Message Manager, File Manager
Yes – the Pantech P2050 Breeze IV supports voice dialing. The Pantech P2050 Breeze IV is equipped with an Advanced Voice Command (AVC) feature. This feature allows you to make calls or use the phone functions by simply using your voice. All you have to do is talk into the phone and then the phone will recognize your voice and complete tasks by itself.
1. Press the Voice Command button to access the “Say a Command” menu; or select Menu > Tools > Say a Command.
Note: The Voice Command button is marked with a voice command icon and is located directly above the CALL button.
2. At the voice prompt, say a command and simply follow the voice prompts.
The following list shows available voice commands.
o Call <Name or #>: Voice dials a name or phone number in your address book. If multiple numbers exist, say the name and the number type (i.e. mobile, home, work, or other).
o Send Message <Name or #>: Display the Create Message screen with the contact you have spoken.
o Contact <Name>: Retrieve and display the contact information stored in the address book.
o Go To <Menu>: Open an application on your phone.
o Check <Item>: Check the status information of your phone (Status, Voicemail, Messages, Missed Calls, Time, Signal strength, Battery, My Phone Number, and Volume).
Always charge your phone with the Pantech authorized AC charger provided in the gift box.
If you need an extra charger for travel, your office or any other reason - please check our Accessories link from the Support pages for your device.
To send your files to another device via Bluetooth
1. Go to Photo Album from the Camera icon.
2. Select the picture or video you want to share.
3. Select Options > Send > via Bluetooth.
4. Select a device among those paired with your phone. The other device will receive a message to accept the file.
5. Follow the on-screen prompts on both products to complete the transfer.
Press the Menu button. While in Breeze Mode, the Main Menu will display a list of the most frequently used functions.
In Advanced Mode, the Main Menu will display icons of the enhanced offerings in a tile format.
Readout Mode makes your phone a useful companion when you can’t or don’t have the ability to read the phone screen. When Readout mode is activated, the phone will announce key alerts, keypad navigation, menu choices, dialed numbers and contained information verbally.
• Provides verbal alerts of the following:
o Missed Call
o New Message receIVed
o Low Battery
o Message Sent and other confirmation notifications
• Announces highlighted items in Menus as user navigates the phone
• Announces numbers as they are pressed on keypad
• Reads out text message content
To activate Readout Mode in Breeze Mode:
1. Select Menu > Settings > Voice Command Setting.
2. Select Audio Modes > Readout mode.
To activate Readout Mode in Advanced Mode:
1. Select Menu > Settings > Phone> Voice Command Setting.
2. Select Audio Modes > Readout mode.
Minimum Requirements:
• Windows XP or later
• Windows Media Player 11 or later
• MicroSD card
• Pantech USB data cable
• Music files must be in a compatible format. The supported file formats are MIDI, i-Melody, MP3, AMR, WAV, AAC, AAC+, WMA.
Transfer music
1. Connect the USB cable to the device and the computer.
2. Select Music Player>Select.
3. Open the Sync tab in Windows Media Player on your computer.
4. Select the music file(s) from the list and drag and drop to your device.
1. Select Menu > Settings > Connectivity > Bluetooth > Activation.
2. Select On or Off.
To add a device:
1. Select Menu > Settings > Connectivity > Bluetooth > My Devices.
2. Select Search for Device.
3. The available devices will be displayed.
4. Select a device > Select.
5. Enter the device’s password and press OK.
Note: The target device must be in discoverable mode.
Your Pantech P2050 Breeze IV will support the following functions via Bluetooth:
• Connect to a PC to access the internet
• Connect to a Hands-free device or headset.
• Connect to electronic devices
• Sending/Receiving files
• Listening to music files from your handset
These are the 3 keys located below the display (1,2,3) that you can assign to your most frequently called contacts, or to any of the built-in features listed after Quick Call.
To assign a contact to Quick Call
1. Press 1.
2. Select Quick Call.
3. Select a contact > Select.
To make a call using one touch key
1. Press the Quick Call key 1 (or 2, 3).
2. Select Call.
To send a message using one touch key
1. Press the Quick Call key 1 (or 2, 3).
2. Select Options > Send Message.
Slow Speech is an application that allows users to listen to conversations and messages more clearly. It is available during live calls and voicemail playback. Once set to "On" Slow Speech remains active.
To Activate in Breeze Mode:
1. Go to Settings > Slow Speech.
2. Set to On.
To Activate in Advanced Mode:
1. Go to Settings > Call > Slow Speech.
2. Set to On.
NOTE: The factory data reset erases all user information such as apps, music, pictures and user settings. The reset may take up to 15 minutes depending on the amount of user data (apps, music, pictures, etc…) stored in memory.
With the device on:
1. Press Menu > Settings.
2. Scroll down the page.
3. Tap Reset.
4. Enter '1234' for password.
5. Tap Master Clear.
You can change the font or text size by:
1. Tap Settings > Display.
2. Tap Font size and select size of font.
You can change the font or text style by:
1. Tap Settings > Display.
2. Tap Font style and select style of font.
AT&T FamilyMap is a subscription service that allows you to locate your family members (their phone addresses) on the map and conveniently check from your phone. To sign up for AT&T FamilyMap, visit www.att.com/familymap. To use this app, go to AT&T GPS > AT&T FamilyMap from Applications list.
Your Pantech Breeze IV's user memory size is 66MB.
You can download as much as you want, not to exceed 66MB of user memory.
When there is less than 10% of memory left, your phone will not download any more applications.
[Note] To help save the internal memory size, you can move items to your applications to microSD card.
Yes. Performing a factory reset will reset your device to out of box default settings.
Backing up your device using PC Suites will allow you to retrieve data previously saved to your device such as contacts, messages, and images.
Here are some tips to improve your battery life:
- For best performance, always use the Pantech authorized AC charger.
- Make sure your battery is fully charged before use.
- In Settings > Display, Adjust the backlight timer to a shorter time (for the screen to automatically turn off).
- Close all applications before turning the screen off.
- Lower the screen brightness.
- Turn off Bluetooth when not in use.
- Turn off GPS location service when not in use.
- Do not set Live Wallpaper on a home screen.
1. Make a call first.
2. Once connected, tap Options > View Contacts.
3. Choose contact you want to call and press Select > Call.
4. When connected to the second call (first call is temporarily placed on hold), select Options > Join.
1. While you are viewing a picture, tap Options > Send. When you have captured an image, just tap Share.
2. Select via what application you want to share the image (Bluetooth, Messaging) and follow the prompts.
1. Select the Camera icon to launch the application.
2. Select Options > Video Camera to switch between camera and video camera mode.
Pictures and videos are saved to your phones memory. You can change the location your media files are saved to and external memory card:
1. Select the Camera icon.
2. Select Options > Settings.
3. Scroll left to and select Advanced.
4. Select Save Location > External Memory.
PC Suite enables communication between your device and compatible PC. Pantech PC Suite is the Windows based program that enables you to manage your device while connected to a compatible PC.
For example, you can sync your outlook contacts with your phone's contacts using Pantech PC Suite.
1. Go to the Pantech website from your Windows based PC.
2. Find and install the PC Suite on your PC.
3. Connect your phone to PC using USB data cable following the instruction on Pantech PC Suite.
[Note] Pantech PC Suite is the Windows based PC program. It is only compatible with Windows 7, 8, Vista and XP.
To change the Bluetooth visibility options on your phone:
1. Select Go To from the home screen > Bluetooth.
2. Select Visibility > Show or Hide.
To change the Bluetooth device name on your phone:
1. Select Go To from the home screen > Bluetooth.
2. Select My Bluetooth Info > Name.
3. Enter a new name. Select Save.
Make sure you have turned on the Bluetooth and follow the below steps:
1. Select Go To from the home screen > Bluetooth.
2. Select My Devices.
3. Select Search to search for surrounding Bluetooth devices.
4. Scroll down and navigate through the Bluetooth devices. Select one to pair.
5. If required, type the PIN and select OK.
Pantech Breeze IV comes with Bluetooth® 2.1 with Enhanced Data Rate.
Supported profiles are:
- OPP (Object Push) for file transfer
- A2DP for wireless stereo headsets
Other supported profiles are:
- AVRCP, GAP, HFP, HSP, PBAP, SPP, Service Discovery Application Profile
While in Advanced Mode:
1. Press the Menu key at the Home screen > Select Settings > Display.
2. In this section, you will find options to alter the Brightness, Backlight Timer, Font Size and Style, Menu Type, and Color Theme.
[Note] Depending on the backlight settings, your phone battery life will differ. To preserve the battery power, adjust to lower Brightness and the shortest Screen timeout interval.
You can add multiple accounts on your Pantech Breeze IV The number of accounts you can add is not limited, but adding multiple accounts may cause a decrease in the performance of your device.
To add an account:
1. Press the Menu key at the Home screen and tap Mobile Email.
2. Select Add Account > Choose email account type.
3. Follow instructions to finish setup.
To remove an Email account:
1. Press the Menu key at the Home screen and tap Mobile Email.
2. Choose email account.
3. Select Options > Delete Account from the pop-up menu list.
Yes. You can add your own signature to all outgoing emails:
1. Go to Mobile Email application > Select email account.
2. Choose Options > Signature.
3. Compose your own signature and tap Save.
From the Home screen:
1. Press Menu key > My Stuff > Memory.
2. Go to Used Space to check the total and available space of your microSD card.
To format the microSD card:
1. Press the Menu key > My Stuff > Memory.
2. Go to Used Space.
3. Select Format.
[Note] Please note that format will erase all data in your microSD card and will not restore any information.
Flight mode helps you turn off all of your wireless connections. This can be convenient on a flight:
1. Press the Menu key at the Home screen.
2. Tap Settings > Sound Profiles > Select Flight Mode.
[Note] Flight mode will deactIVate the cellular signal, Bluetooth and GPS functions all at once. However, you can manually turn on each function for your preference.
In case your device would not power on, please try any of the steps below:
The latest software for your device is not available online. You can find your device software information in Menu > Settings > AT&T software update > Check for updates. If a new version is available for download, please update your device.
[Note] When downloading the software, we highly recommend you to connect to Wi-Fi network instead of using 3G network in order to fasten the download speed and avoid the heavy charges for using 3G data services.
Please make sure your battery is charged fully before use. Nevertheless, some features such as playing the media files, using camera or camcorder, running applications in the background, constantly syncing email and using Wi-Fi or Bluetooth, can drain the battery more quickly than usual.
Below suggestions would help conserve the power:
If your device has a problem not responding or slowing down, you may try a hard reset by removing and reinserting the battery.
If you would like to erase all data on your device, please do a Factory data reset. To do this, go to Settings. Tap Privacy > Factory data reset > Reset device > Erase everything. We recommend you back up your data before doing Factory data reset because it will delete your Google account information and all downloaded applications on your device including ringtones. However, factory data reset will not erase the data saved on the SIM card and microSD card.
Please try any of the steps below:
PC Suite enables communication between your device and compatible PC. Pantech PC Suite is the Windows based program that enables you to manage your device while connected to a compatible PC. For example, you can sync your outlook contacts with your phone's contacts using Pantech PC Suite.
Please download the compatible PC Suite with your Pantech Crossover and then connect to the PC:
[Note] PC Suite for the Pantech Crossover works with Windows 2000 or XP family, Windows7 and Vista 32 bit. Your PC must have minimum 300MB of free disk space to install PC Suite.
If your device is in use for prolonged periods of time (e.g. talking on the device, playing music or video, browsing the web, running applications or charging the battery), it may become warmer than when in standby mode. In most cases, this condition is normal and therefore not a failure of the device.
The SIM card is the Subscriber Identity Module card that you receive with your device upon activation. It contains your network registration information and PIN code. The SIM card is physically installed in your device and one of its primary functions is to identify your device uniquely - apart from all other devices on the carrier's network.
You are allowed to enter a pattern for five times and after that, you will be asked to wait for 30 seconds before you can try again. If you continuously enter the wrong pattern, your device will be permanently locked and only be unlocked with your Google account. In case you have forgotten the unlock pattern:
If you cannot recall the unlock pattern and has the Google account set up on your device, tap OK > Forgot Pattern? on the bottom of your screen. Sign in with your Google account and create a new unlock pattern. If you know your Google account address, but have forgotten the its password, please visit http://www.gmail.com on a computer. From the Gmail login page, click on the Can't access your account? and follow the prompts to have Gmail send you a password change request link to your other email address. When you have received a new login information, use that information to unlock your device following steps above.
If you cannot recall the unlock pattern and does not have the Google account set up on your device, there is no way to unlock the device. Please return your device to obtain repair or replacement service. Make sure to check with your carrier or Pantech technical support center if your device is eligible for warranty service.
[Note] Please try not to set up a complicated unlock pattern that is easy to forget. Your device will be still locked when restarted.
Please try any of the steps below, if your camera does not work:
Please try any of the steps below if your device screen is not responsive:
When Compass does not work correctly, hold your device and draw a 8 for 5 times in a non-magnetic environment. Make sure to use only your wrist.
[Note] There is no setting or application to adjust the digital compass sensor. While drawing 8, it will automatically make correction.
Make sure you are in a Wi-Fi service area and covered with strong Wi-Fi signal. The number of bars in Wi-Fi icon shows the signal strength.
If the problem is not solved, try any of the steps below:
[Note] If too many people are connected to one Wi-Fi network, your device may fail to access Wi-Fi due to congestion.
In case the PC Suite is not working correctly on your PC:
1. Make sure your device is disconnected from the PC first.
2. Uninstall the PC Suite from your PC.
3. Go to www.pantechusa.com and find the compatible PC Suite for your model.
4. Download and re-install the PC Suite and open it on your PC.
5. Connect your device to the PC with the USB data cable.
6. Wait for your PC to automatically search for the New Hardware Port and install the driver for your device. This takes 10-30 seconds according to PC specification.
7. When this is correctly installed, your device will automatically open the Data Manager application and appear Connected.
8. You can now make the desired changes via PC Suite.
Some applications do not allow keyboard/keypad inputs. Try working keys in other screen, and if the problem does not go away, restart your device after disconnecting the battery.
Try to power cycle your device using the normal on-off button or icon. If this doesn't work, you can force a hard reset by removing the battery, reinserting it, and turning the device on again. For devices with an internal battery which is not removable by the end user (e.g. Pantech P4100 Element tablet), please refer to the FAQs for your specific device.
If your device would not read the installed micorSD card, try any of the steps below:
Charging time varies for each device. Charging time will also vary depending on the battery's voltage when charging is started. Generally speaking, for all batteries and all battery conditions, a full charge should be completed in less than 4 hours using the Pantech AC charging adaptor. If you are charging with a USB cable connected to a PC, the time to achieve a full charge may be longer. In either case, it will take longer than usual if you use the device while charging.
[Note] If the battery level is 10% or below, charging with AC adaptor is highly recommended. For Tablets and Smart Phones which usually carry a high capacity battery, you should use the Pantech AC charging adaptor for the best possible performance.
Please try any of the steps below:
If your device memory is full, it cannot send and/or receive text message. Please delete any meessages currently in your inbox and outbox to enable messaging.
If the problem is not solved, please try any of the steps below:
[Note] Text messaging is the feature provided from your carrier. You may have to add this feature to your plan and make a payment. At times, it may be disabled due to the problem on the carrier's end.
Please try any of the steps below accroding to your problem:
Applications may come to shut down altogether at once when you are running several applications simultaneously. This happens due to the memory capability of the device and is not a defect to be repaired or exchanged with new device.
Try to power cycle your device using the normal on-off button or icon. If this doesn't work, you can force a soft reset by removing the battery, reinserting it, and turning the device on again.
If your device supports Bluetooth, your device has been basically tested and found to comply with the FCC and NAC. However, there is no gurantee that inteference will not occur in a paticualr installation.
In case Bluetooth connection is not functioning correctly, please try any of the steps below:
Please try any of the steps below and then send a test email:
The latest software for your device is not available online. You can find your device software information in Menu > Settings > AT&T software update > Check for updates. If a new version is available for download, please update your device.
Blocking the device part, where the internal antenna is embedded, may cause poor audio quality. Try not to attach a sticker or a protective film on the top of such part. Do not grab the device covering that part or touch it with finger or metal during the call. Please see where the internal antenna is embedded on your device from the user manual.
In case the PC Suite is not working correctly on your PC:
Make sure you are in the area with good cell signal. To ensure it, see the signal strength indicator on the top right of your device screen.
If the bar is full, then please try any of the steps below:
To display pictures stored on your microSD card using Gallery, make sure your device is not mounted as a USB storage device. (On the Pantech Crossover, turn off USB storage by tapping the Notification bar on top of your screen.) When connected to a PC and PC is reading memory, your device cannot access microSD card.
Applications may contain internal errors and do not open on your device. You can contact the developer of that application to report the errors:
If your device is in use for prolonged periods of time (e.g. talking on the device, playing music or video, browsing the web, running applications or charging the battery), it may become warmer than when in standby mode. In most cases, this condition is normal and therefore not a failure of the device.
Make sure you permit the screen to auto-rotate in Menu > Settings > Display.
[Note] Display does not rotate while on a call and if you are in Camera or S-Board application.
If your external keys or Home button are slow to respond, it may be due to applications running in the background. Please close all applications, turn off your device, remove and reinsert the battery and turn on the device. If the failure continues after all, your device may be defective and requires a repair service.
If an indivisual key is not functional, that key may be defective. and require a repair service.
Your device could drop calls, if you are outside or far from the call service area. Please check the signal strength indicator on your device screen and move to the area with good coverage.
Blocking the device part where the internal antenna is located, such as adding an attachment on it, touching it by finger or metal during the call, grabbing the device covering that part, may also drop the call signal. Please see where the internal antenna is embedded on your device from the user manual.
The GPS signal reception may be interfered by obstacles such as bridges, forests, rainy, foggy or cloudy weather, tunnels, high-rise constructions, mountains, etc. It also cannot penetrate through solid and non-transparent objects. Please avoid these objects or area when connecting to GPS satellites.
If your device seems slow, try any of the steps below to improve the speed:
If the website size is too big or requires certain technical specifications, it may not be viewable in your device.
[Note] The Pantech Crossover does not support Adobe Flash Player and thus, websites built on flash player are not displayed.
Please download the compatible PC Suite with your Pantech Breeze IV and then connect to the PC:
1. Go to www.pantechusa.com and find the compatible PC Suite for you model.
2. Download and install the PC Suite and open it on your PC.
3. Connect your device to the PC with the USB data cable.
4. Wait for your PC to automatically search for the New Hardware Port and install the driver for your device. This takes 10-30 seconds according to PC specification.
5. When the software is correctly installed, your device will automatically open the Data Manager application and appear Connected.
6. You can now make the desired changes via PC Suite.
[Note] PC Suite for the Pantech Breeze IV works with Windows 2000 or XP family, Windows7, Windows 8, and Vista 32 bit. Your PC must have minimum 300MB of free disk space to install PC Suite.
If your device supports Bluetooth, your device has been basically tested and found to comply with the FCC and NAC. However, there is no gurantee that inteference will not occur.
In case Bluetooth connection is not functioning correctly, please try any of the steps below:
1. Make sure Bluetooth is turned on your device.
2. Check if the Bluetooth device you would like to pair is fully charged.
3. Make sure the Bluetooth device you are trying to pair is within 33 ft (10 meters) of your device.
4. Scan for devices first and attempt to pair when the device is found.
5. Bluetooth devices currently connected to other devices may not support pairing with your device. Turn off the connection of the other Bluetooth device first and try pairing it with your device.
Make sure you are in the area with good cell signal. To ensure it, see the signal strength indicator on the top right of your device screen.
If the bar is full, then please try any of the steps below:
1. Check if your device is set on Airplane mode. Undo it.
2. Check if the SIM card is inserted correctly.
3. After pressing the device number, make sure to press the dial icon.
4. Make sure not to block the device part where the internal antenna is located. Please see where the internal antenna is embedded on your device from the user manual.
The SIM card is the Subscriber Identity Module card that you receive with your device upon activation. It contains your network registration information and PIN code. The SIM card is physically installed in your device and one of its primary functions is to identify your device uniquely - apart from all other devices on the carrier's network.
The signal strength indicator on your device screen may display fewer bars at times even when you are in the area of good coverage, but this does not mean that your device is picking up less signal than other devices because all devices are differently designed to display the cell signal.
Do not cover or damage the device part where the internal antenna is embedded. It may be obstructing the device from better reception. Please see where the internal antenna is embedded on your device from the user manual.
Please try any of the steps below and then send a test email:
Applications may shut down altogether at once when you are running several applications simultaneously. This happens due to the memory capability of the device and is not a defect that needs to be repaired or exchanged with a new device.
Blocking the device part where the internal antenna is embedded may cause poor audio quality. Try not to attach a sticker or a protective film on the top of this part. Do not grab the device covering that part or touch it with your finger or metal during the call. Please review the user manual to locate the internal antenna.
Please try any of the steps below, if your camera does not work:
1. Make sure you have inserted and mounted microSD card onto your device.
2. Check if camera lens is dirty and clean the lens with a soft, dry cloth first.
3. Check if a seal is attached on the lens, please remove.
4. Take a picture in an area of adequate light and reamin still until the shutter sound is gone to avoid taking faded picture.
If your external keys or Home button are slow to respond, it may be due to applications running in the background. Please close all applications, turn off your device, remove and reinsert the battery and turn on the device. If the failure continues , your device may be defective and require repair service.
If an individual key is not functional, that key may be defective and require repair service.
Please try any of the steps below:
1. Check if microSD card is correctly inserted in your device. Turn off your device, pull out microSD card, put it in again and turn on your device.
2. Ensure the microSD card is not damaged. Memory cards formatted in other devices PC may not be recognized in your device.
3. Make sure microSD card is mounted on your device. Go to Settings > SD card & device storage and check if Unmount SD card is highlighted or else tap Mount SD card after power cycling your device.
4. Format microSD card before moving any files to it. Format is only enabled when microSD card is inserted in your device and unmounted.
5. If the file size to move or save onto your microSD card is too big, it takes longer time.
Charging time varies for each device. Charging time will also vary depending on the battery's voltage when charging is started. Generally speaking, for all batteries and all battery conditions, a full charge should be completed in less than 4 hours using the Pantech AC charging adaptor. If you are charging with a USB cable connected to a PC, the time to achieve a full charge may be longer. In either case, it will take longer than usual if you use the device while charging.
[Note] If the battery level is 10% or below, charging with AC adaptor is highly recommended.
Some applications do not allow keyboard/keypad inputs. Try using keys in other screens, and if the problem does not go away, restart your device after removing the battery.
If your device does not read the installed microSD card, try any of the steps below:
1. Check if microSD card is correctly inserted in your device. Turn off your device, pull out microSD card, put it in again and turn on your device.
2. Ensure the microSD card is not damaged. Memory cards formatted in other devices may not be recognized in your device.
3. Make sure microSD card is mounted on your device. Go to Settings > SD card & device storage and check if Unmount SD card is highlighted or else tap Mount SD card after power cycling your device.
4. Try formatting microSD card. Format is only enabled when microSD card is inserted in your device and unmounted.
5. If your device is connected to PC, device cannot access microSD card for PC to read it. Disconnect your device from PC and then try again.
The signal strength indicator on your device screen may display fewer bars at times even when you are in the area of good coverage, but this does not mean that your device is picking up less signal than other devices because all devices are differently designed to display the cell signal.
Do not cover or damage the device part where the internal antenna is embedded. It may be obstructing the device from better reception. Please see where the internal antenna is embedded on your device from the user manual.
If your device seems slow, try any of the steps below to improve the speed:
1. Adjust the Animation setting in Display settings by choosing No animations.
2. Power cycle your device (turn it off, then on again) to free memory that may be lacking by applications running in the background.
If your device memory is full, it cannot send and/or receive text messages. Please delete any messages currently in your inbox and outbox to enable messaging.
If the problem is not solved, please try any of the steps below:
1. Check if you are in coverage service area.
2. Check if your device is set on Airplane mode. If so, turn off.
3. Check if the SIM card is inserted correctly.
4. Check that you have not blocked certain messages such as Advertisement or messages from Anonymous Sender in Messaging Settings.
[Note] Text messaging is a feature provided from your carrier. You may have to add this feature to your plan and make a payment. At times, it may be disabled due to a problem on the carrier's end.
To display pictures stored on your microSD card using Gallery, make sure your device is not mounted as a USB storage device. When connected to a PC and PC is reading memory, your device cannot access microSD card.
Please try any of the steps below accroding to your problem:
1. If a photo is too dark or too light, adjust the Exposure Setting by selecting the Exposure icon (that looks like a sun) and changing the brightness level.
2. If the picture quality is grainy, adjust the Resolution Setting. 3 megapixel (2048x1536) images are optimal for best resolution.
3. If a picture is not in focus, select Auto Focus mode in Camera Settings.
4. Check if camera lens is dirty and clean the lens with a soft, dry cloth.
Your device could drop calls if you are outside or far from the call service area. Please check the signal strength indicator on your device screen and move to an area with good coverage.
Blocking the device part where the internal antenna is located, such as adding an attachment on it, touching it with a finger or metal during the call, or grabbing the device covering that part may also drop the call signal. Please see where the internal antenna is embedded on your device by reviewing the user manual.
The GPS signal reception may be interfered by obstacles such as bridges, forests, rainy, foggy or cloudy weather, tunnels, high-rise constructions, mountains, etc. It also cannot penetrate through solid and non-transparent objects. Please avoid these objects or area when connecting to GPS satellites.
Please try any of the steps below and then send a test email:
1. Confirm your account's Username and Password in Incoming/Outgoing server settings. It may be due to Authentication error.
2. If the account is set up properly, but you cannot send an email through the email provider's server, change your Incoming and Outgoing settings in Account settings. Try sending an email with each Security type - SSL and SSL(Accept all certificates).
3. Try sending email using Gmail or other email account. It may be the problem of email service provider's end.
4. Turn off the device, turn it on again and try sending a test email.
Having difficulties in finding your answers in the Product Manuals section?